- YourGovernment
-
OurCommunity
-
- About Tualatin Advisory Committees Animal Services Community Involvement City Codes City Council City Projects
- Community Crime Reports Customer Service Request Explore Tualatin Now Fire Library Municipal Court Tualatin Today
- Parks & Recreation Passports Permits & Forms Planning & Zoning Police Volunteer Tualatin Moving Forward
-
-
ForVisitors
-
- Parks, Greenways, Recreation and Library Library Parks Public Art Parks and Recreation
- Shopping, Dining, and Entertainment Chamber of Commerce
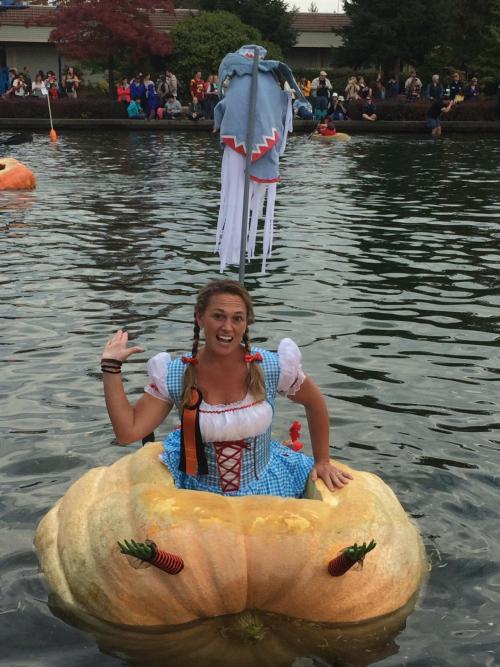
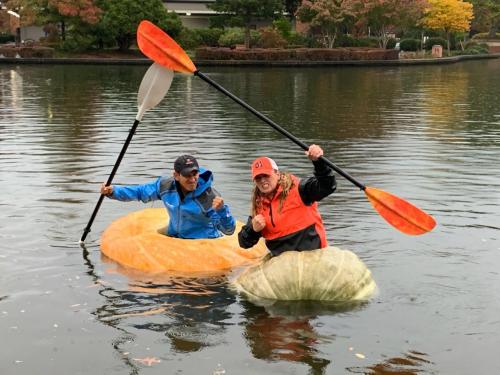
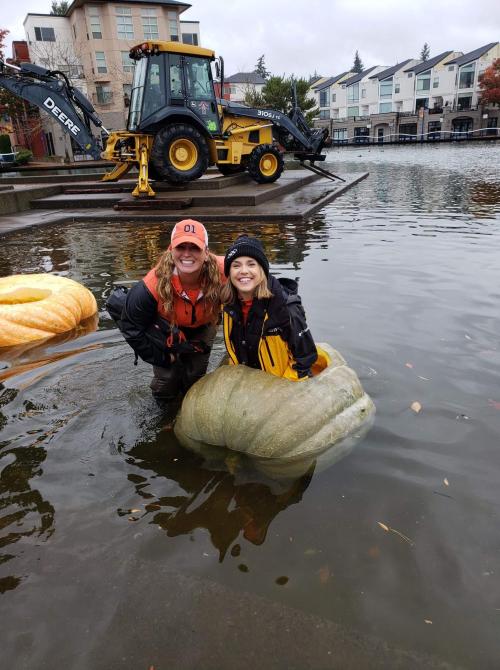
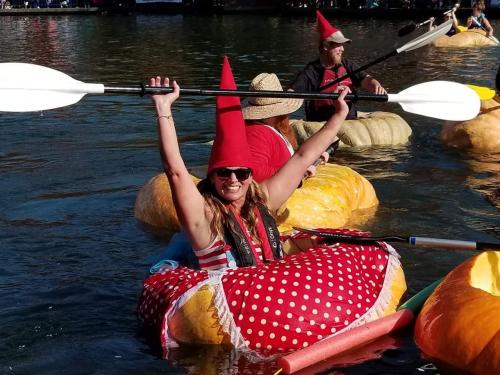
- Community Events Community Theatre Pumpkin Regatta Special Events
-
- DoingBusiness
-
HowDo I?
-
- Apply for a Job Apply for an Advisory Committee Contact the City Council Get a Copy of a Police Report File a Records Request Find Forms
- Find Planning & Zoning Find Public Transportation Find the City Code Get a Business License Get Email Subscriptions/Notifications Locate City Offices
- Contact the City Pay My Traffic Fine Pay My Water Bill Reserve a Facility Sign Up for a Recreation Program Search the Website Volunteer
-
Charity Marshall's Tips for Growing Giant Pumpkins
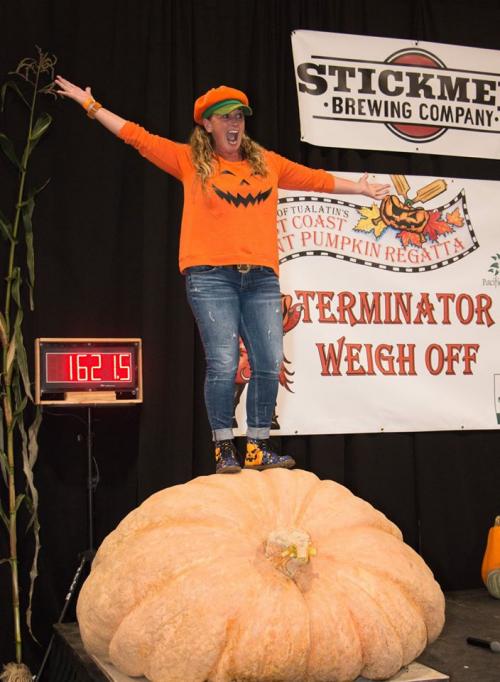
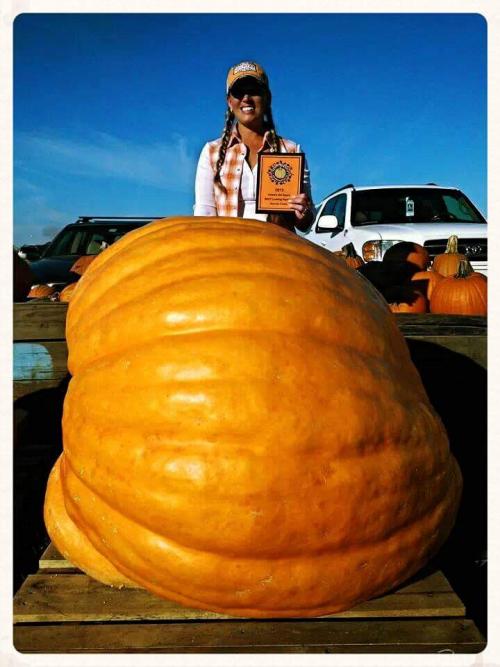
Charity Marshall is a member of the Pacific Giant Vegetable Growers. She has been has been growing giant pumpkins competitively for the past 6 years. Her personal best weighed in at a whopping 1621.5 pounds at this year's Terminator Weigh-Off which took place at the City of Tualatin's Pumpkins and Pints!
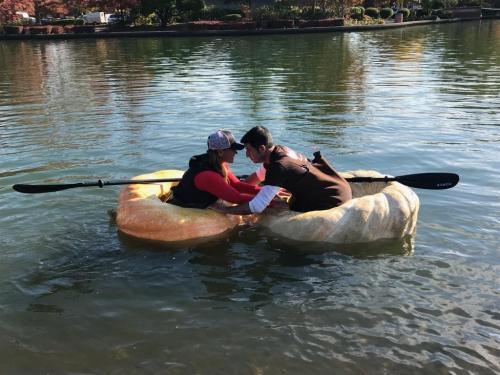
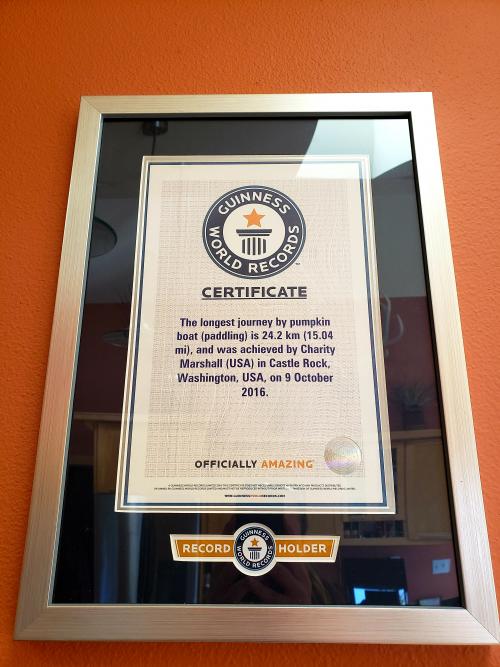
In 2016 Charity broke the World Record for the longest journey by pumpkin boat by paddling over 15 miles down a river in Castle Rock Washington.
You may have seen Charity on one of her many early morning news shoots to help promote the West Coast Giant Pumpkin Regatta on KGW and Fox12.
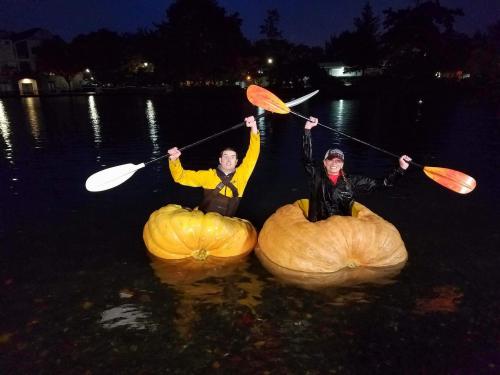
Charity has paddled in the West Coast Giant Pumpkin Regatta 4 times. She finished in second place twice and has won the award for best costume and best decorated pumpkin several time.
PRO TIPS FROM CHARITY MARSHALL
1) The Plot
Like any plant, Atlantic Giant pumpkins need good soil. Good drainage is especially important, as well as nutrients. Ph of 7.0 is the best. Also, as much sun as possible as long as possible each day.
You will need at least 400 square feet for each plant. Some growers have an area as large as 2500 square feet per plant.
As planting time approaches, erect a cold frame over the spot where you will transplant the pumpkin start, to warm the ground. Some growers install heating coils in the ground.
2) The Seed
Atlantic Giant pumpkin seeds can be purchased in a seed store or online.
The Pacific Giant Vegetable Growers (PGVG) hold an online auction for their members; they have seeds for sale now ($10-$40). The club also sends out a "seed package" to its members each year. Each of these seeds are identified by its grower, the seed it was grown on (female), and the seed that pollinated it (male).
3) Starting Seeds
Start seeds in potting soil in 4" pots in April. Before potting, file the edges of the seed and soak the seed in warm water for 1-8 hours.
Keep the pot warm on the heating pad with grow lamp (about 5" above the pot once plant has emerged), on top of refrigerator or in a window sill.
Note the first true leaf. The main vine will grow opposite this leaf.
4) Planting Starts
The plant can be transplanted to the cold frame as soon as the first true leaf is 2" across (if weather is not too cold). Plant at the edge of the plot. Include a mycorrhizal inoculant with the plant to help deter fungus later in the season.
Try to keep the plant at a relatively constant temperature, day and night. A suggestion is a bucket over top the plant, covered by a blanket, at night. Remove in the morning.
Keep the plant in the cold frame until it outgrows it. Open up the cold frame during the day if the weather is warm.
5) Vine Growth
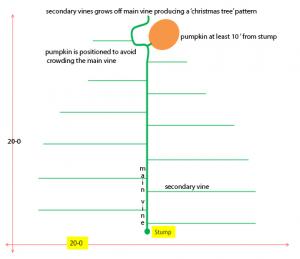
Guide the main vine in the direction you intend, if needed. Secondary vines will grow generally perpendicular to the main vine. Tertiary vines will start growing off the secondary vines; these need to be clipped. Vines will grow as much as 12" per day.
Bury the main and secondary vines, so only the leaves are growing above the ground. Dig trenches for the vines to grow into and then cover the vine as it grows along the trench. The fine will put out a taproot at each leaf.
Clip main vines once they reach the edges of your plot. Mine is 20'x20', so the main vine is 20' and the secondaries are 10'. A typical plant ends up in the Christmas tree shape.
6) Pollination
Male and female blossoms form in late June/early July. Male blossoms arrive first. You will know a female blossom, as it has a small pumpkin at its base. You can pollinate specific female blossoms, or let the bees do the work. If you hand-pollinate, you will know the male plant for your pumpkin.
To hand-pollinate, pick several male blossoms from the same plant. Remove the petals to expose the stamen, then brush the inside of the female blossom. Use a rubber band or wire tie to close the petals of the female blossom, so no other pollination will happen for that blossom.
Choose a female blossom on a strong vine. Often the main vine is preferred. Many sources say it should be 10' from the stump.
Pollinate 2-3 blossoms on a plant. For about 2 weeks, note how well they are growing. Choose one that seems the best (healthy, good growing, good shape, good vine). Cut all of the others.
7) Plant and Pumpkin Growth and Care
Most resources suggest spreading a bed of sand under the chosen pumpkin to keep it out of contact with the moist earth below, to prevent rot. Un-bury the vine (clip the taproots) around the chosen pumpkin.
The vines will still be growing. Continue to bury them until they reach the edge of the plot. Blossoms will continue to appear. Clip these. You want all of the energy to go into one pumpkin.
8) Water
Water throughout the life of the plant. Keep the ground moist, but not wet. Always water at ground level or underground. Wet leaves will encourage fungus.
This is an area where growers have devised several approaches. Timed drip systems are common. Some growers have developed computerized systems that turn the water on/off according to sensed ground moisture.
Each plant will take a lot of water, especially in August and September.
9) Fertilizing
Miracle Gro works as a general fertilizer. I also use blood meal at planting, bone meal as the vines grow, and muriate of potash in August and September to help fruit growth.
Apply fish emulsion and seaweed throughout the season. There are many fertilizers that promise results. PGVG was promoting Wallace organic WOW "Wonder Brew" last year.
10) White Powdery Mildew
White powdery mildew is very common in the area. One grower told the club last year "you will get mildew, it's just a matter of when." To minimize the mildew, and delay its onset, use a fungicide such as Daconcil. The mycorrhizal inoculant will also help to deter this issue.
11) Stem Stress
If too much tension occurs at the stem of the pumpkin, the vine can split. To avoid this:
- Cut the taproots below the vine near the pumpkin, so the vine can lift up as the pumpkin grows larger and the stem raises up from the ground.
- Encourage the pumpkin to grow at a 90 degree angle from the vine. You can consider the position of the pumpkin when choosing which pumpkin to keep. You can also reposition the pumpkin slowly (an inch daily) when it is relatively small.
- Cut leaves away from the pumpkin.
12) Cracks in the Pumpkin
Cracks in the pumpkin can occur as the pumpkin grows at large rates. Protect the pumpkin from hot sun.
13) Estimating Weight
Measure the pumpkin to estimate weight.
- Measure the circumference parallel to the ground. This measurement can be used with the "Circumference" table when the pumpkin is relatively small
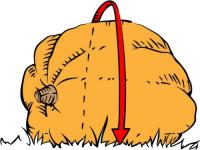
- Measure the "side-to-side" measurement at the pumpkin's highest point.
- Measure the "end-to-end" measurement at the pumpkin's highest point
- Add the 3 measurements above and use the total in the "Over the Top" table.
Hint: get a long tape! I use a 144" quilting tape; by the latter part of the season it is too short.


14) Harvesting
The best way to pick up the pumpkin is with slings and a special lifting ring.
You can grow the pumpkin on a pallet and then lift the pallet with a forklift.
We grew a pumpkin on a pallet, then pushed the pallet with a tractor up a ramp onto our trailer.
Transport on trailer or pickup truck.
15) What to do with your Giant Pumpkin
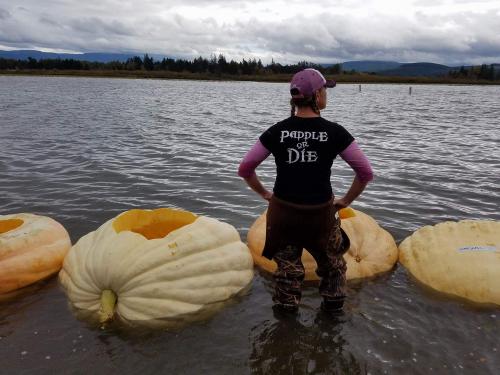
Weight it! PGVG has its main weigh-in in Gervais, Oregon the first weekend of October. They also have the Terminator Weigh-Off and West Coast Giant Pumpkin Regatta the third weekend of October.
Carve it! They make great Halloween decoration.
Save the seeds for next year!
Brag!
Resources:
A Google search will bring you many links to explore.
Big Pumpkins
Modern Farmer
Pacific Giant Vegetable Growers
Click any thumbnail image to view a slideshow